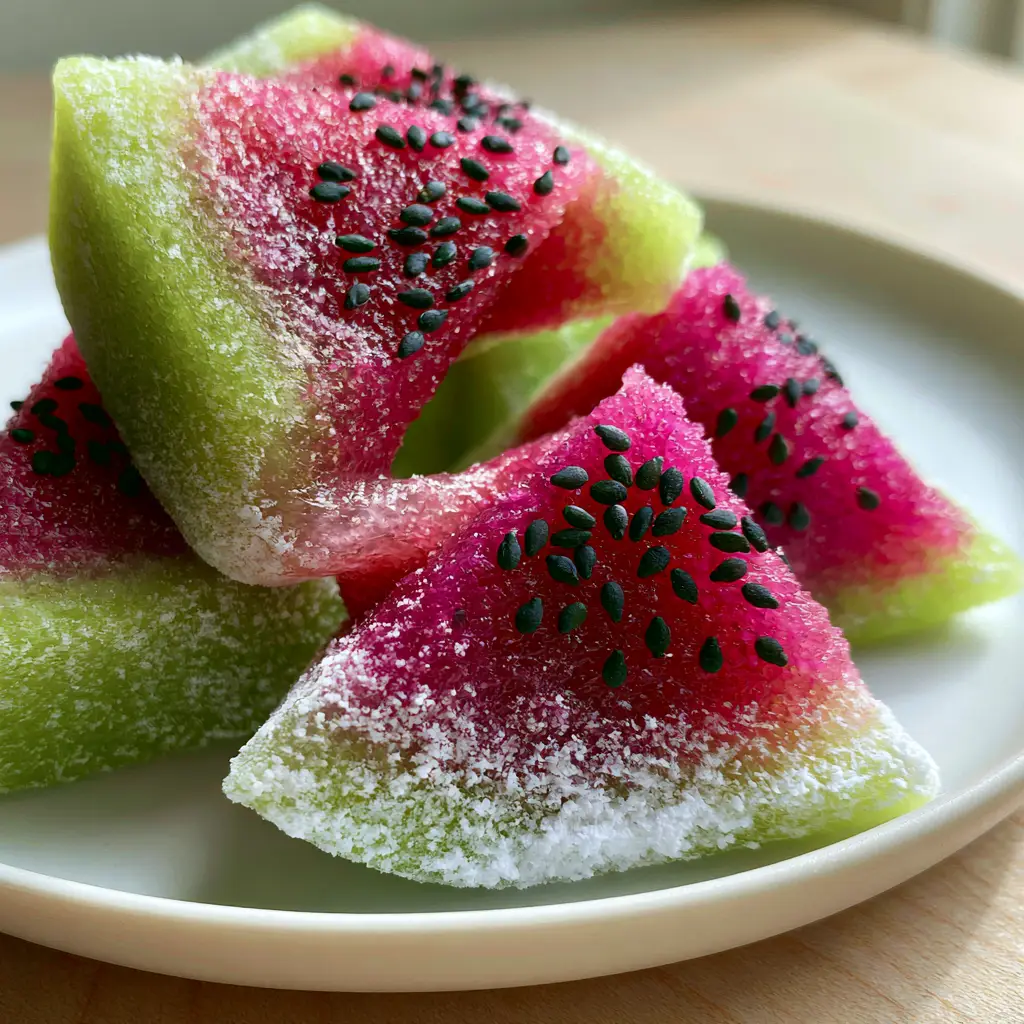
Watermelon mochi is the absolute pinnacle of summer dessert aesthetics, combining the iconic, vibrant colors of everyone’s favorite seasonal fruit with the irresistible, chewy texture of Japanese rice cakes. If you have been scrolling through Pinterest looking for a dessert that stops people mid-swipe, this watermelon mochi is exactly what you need. With a vibrant lime-green outer skin and a bright fuchsia pink center, these little gems are as delicious as they are photogenic. Whether you are a seasoned wagashi pro or a beginner looking for easy microwave snacks, this recipe delivers professional results with minimal equipment.
Why You Will Obsess Over This Watermelon Mochi
- Unbeatable Texture: We use a specific ratio of glutinous rice flour to ensure a stretchy, translucent dough that stays soft for days.
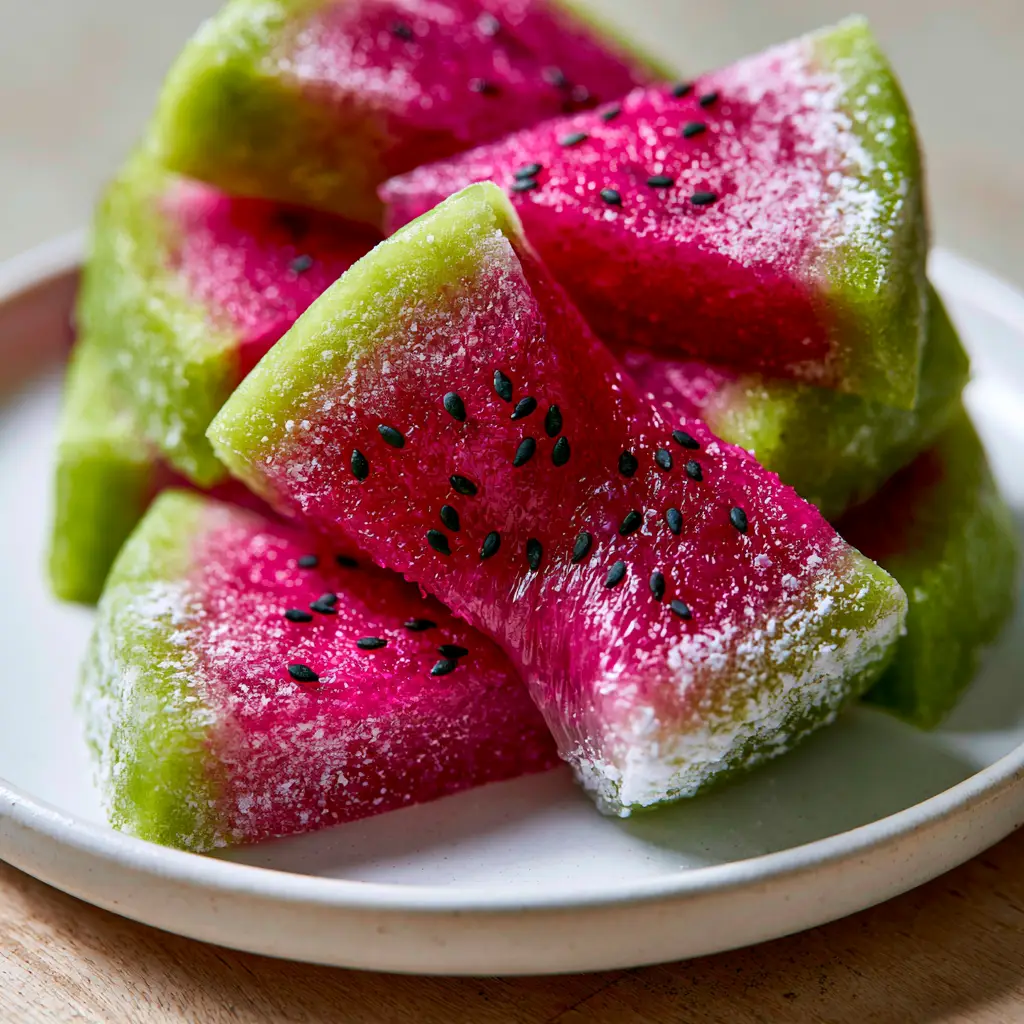
- Visual Masterpiece: The contrast between the lime-green rind and the fuchsia filling, complete with black sesame seed “seeds,” creates a stunning watermelon wedge effect.
- Perfect for Parties: These are naturally gluten-free and vegan-friendly, making them a crowd-pleaser for any summer gathering alongside a fresh strawberry salad.
- Tactile Satisfaction: There is nothing quite like the feeling of a soft, matte mochi dusted in fine white cornstarch being gently squeezed.
The Science of the Perfect Mochi Dough
To achieve that signature watermelon mochi stretch, we have to talk about amylopectin. Unlike standard long-grain rice, glutinous rice (or sweet rice) is almost entirely made of amylopectin starch. This is what creates the “bouncy” or “QQ” texture that defines high-quality mochi.
For this recipe, we recommend using Shiratamako or Mochiko. Shiratamako is processed into small granules and yields a more refined, silky finish, while Mochiko is a fine powder that is more widely available in grocery stores. Both will work beautifully to create the stretchy green mochi dough required for our watermelon rind.
Essential Ingredients for Vibrant Watermelon Mochi
Glutinous Rice Flour (Mochiko): 1.5 cups (200g). This is the structural foundation of the recipe. Ensure you do not use regular white rice flour, or the dough will not be sticky or stretchy.
Granulated Sugar: 1/2 cup (100g). Sugar does more than sweeten; it acts as a softener, keeping the rice starch from hardening too quickly (a process called retrogradation).
Filtered Water: 1 cup (240ml). Essential for hydrating the starch granules during the cooking process.
Watermelon Extract or Juice: 1 tablespoon (15ml). To give the bright fuchsia pink center an authentic summer flavor profile.
Gel Food Coloring: You will need lime green and fuchsia/pink. Gel is preferred over liquid to avoid altering the hydration levels of the dough.
Black Sesame Seeds: 1 tablespoon (15g). These provide the forensic visual accuracy of watermelon seeds pressed into the center.
Cornstarch (or Potato Starch): 1/2 cup (60g). For dusting your work surface and the finished mochi to prevent sticking and give that matte, powdered finish.
Step-By-Step Instructions for Handmade Watermelon Mochi
1. Preparing the Dual-Colored Base
In a large glass microwave-safe bowl, whisk together the glutinous rice flour, sugar, and water until a smooth, thin paste forms. Split this mixture into two separate bowls. To one bowl, add a drop of lime green gel coloring to create the stretchy green mochi dough. To the second bowl, add the fuchsia coloring and the watermelon extract for the bright pink mochi filling.
2. The Cooking Process (Microwave Method)
Cover the green dough bowl with plastic wrap, leaving a small vent. Microwave on high for 1 minute. Remove and stir with a wet spatula. The dough will look patchy; this is normal. Repeat the process in 30-second bursts until the dough is translucent and incredibly stretchy. Repeat this entire process for the fuchsia dough. You will know it’s done when the color deepens and the texture becomes cohesive and glossy.
3. Incorporating the Seeds
While the fuchsia dough is still warm, fold in the black sesame seeds. Distribute them evenly so that every bite looks like a real watermelon wedge. Let the dough cool slightly until it is safe to handle but still warm to the touch.
4. Shaping the Watermelon Wedges
Generously dust your work surface with fine white cornstarch. Roll out the green dough into a long rectangle. Roll the pink dough into a log of the same length. Place the pink log in the center of the green rectangle and wrap the green dough around it, sealing the seam with a gentle pinch. The stretchy, translucent nature of the dough allows you to pull it tight without tearing.
5. The Final Dusting and Cut
Roll the entire log in more cornstarch until it has a soft, matte appearance. Using a sharp knife (or a piece of unflavored dental floss for the cleanest cut), slice the log into rounds, then slice those rounds into halves or quarters to create the watermelon mochi wedges seen in our visual blueprint.
Expert Tips for Mochi Success
- Use Wet Hands: Mochi is notoriously sticky. Keep a small bowl of water nearby to dip your fingers in when handling the warm dough.
- Don’t Skimp on Starch: The fine layer of white cornstarch powder is the only thing standing between you and a sticky disaster. Dust your hands, the knife, and the plate.
- Avoid Over-Microwaving: If the dough becomes hard or brittle, it has been cooked too long and has lost its moisture.
- High-Quality Coloring: Use concentrated gels to get that bright pink mochi filling without making the dough too runny.
Storage, Reheating & Freezing
Watermelon mochi is best enjoyed the day it is made. However, you can store leftovers in an airtight container at room temperature for up to 2 days. Do not refrigerate mochi, as the cold temperature causes the starch to crystallize, turning your soft treat into a hard rock.
If you must store them longer, you can freeze individual wedges wrapped in plastic wrap. To eat, let them thaw at room temperature for about 30 minutes until the stretchy, chewy texture returns.
What to Serve With Watermelon Mochi
This refreshing dessert pairs perfectly with a light summer lunch. Consider serving it after a round of bang bang chicken skewers or a light lemon white bean pasta. The sweetness of the mochi acts as a beautiful palate cleanser after savory, garlic-forward dishes like honey garlic chicken.
Frequently Asked Questions
Yes! You can steam the dough in a heat-proof bowl for 15-20 minutes, stirring halfway through, until the dough is translucent and stretchy.
Yes, you can replace the water in the pink dough section with fresh, strained watermelon juice for a more natural flavor and color.
Handmade mochi is softest on day one. By day three, the starch begins to harden. Store at room temperature in an airtight container to maintain texture.
Glutinous rice flour is mandatory. Shiratamako provides the smoothest texture, but Mochiko is a widely available and excellent alternative.
Mochi is naturally very sticky. Ensure you are using enough cornstarch on your hands and work surface, and handle the dough while it is warm, not hot.
The Ultimate Watermelon Mochi Recipe
Watermelon Mochi Recipe: The Ultimate Stretchy Summer Treat
Ingredients
Equipment
Method
- Whisk rice flour, sugar, and water. Divide into two bowls. Color one lime-green and the other fuchsia pink.
- Microwave each bowl in 30-second intervals, stirring in between, until the dough is translucent and stretchy.
- Fold black sesame seeds into the pink dough to look like watermelon seeds.
- Wrap the green dough around the pink dough log. Dust with cornstarch and slice into wedges.
Notes
Work with the dough while it is warm for maximum stretch.

Save This Recipe to Pinterest!
If you love this watermelon mochi, please save it to your Pinterest Dessert Board by clicking the “Pin” button! Sharing this recipe helps others find these chewy, colorful treats. Don’t forget to follow stacy_bites for more creative kitchen inspiration. If you make this, upload a photo in the comments—we want to see your stretchy creations! Please leave a 5-star rating if you enjoyed this recipe.