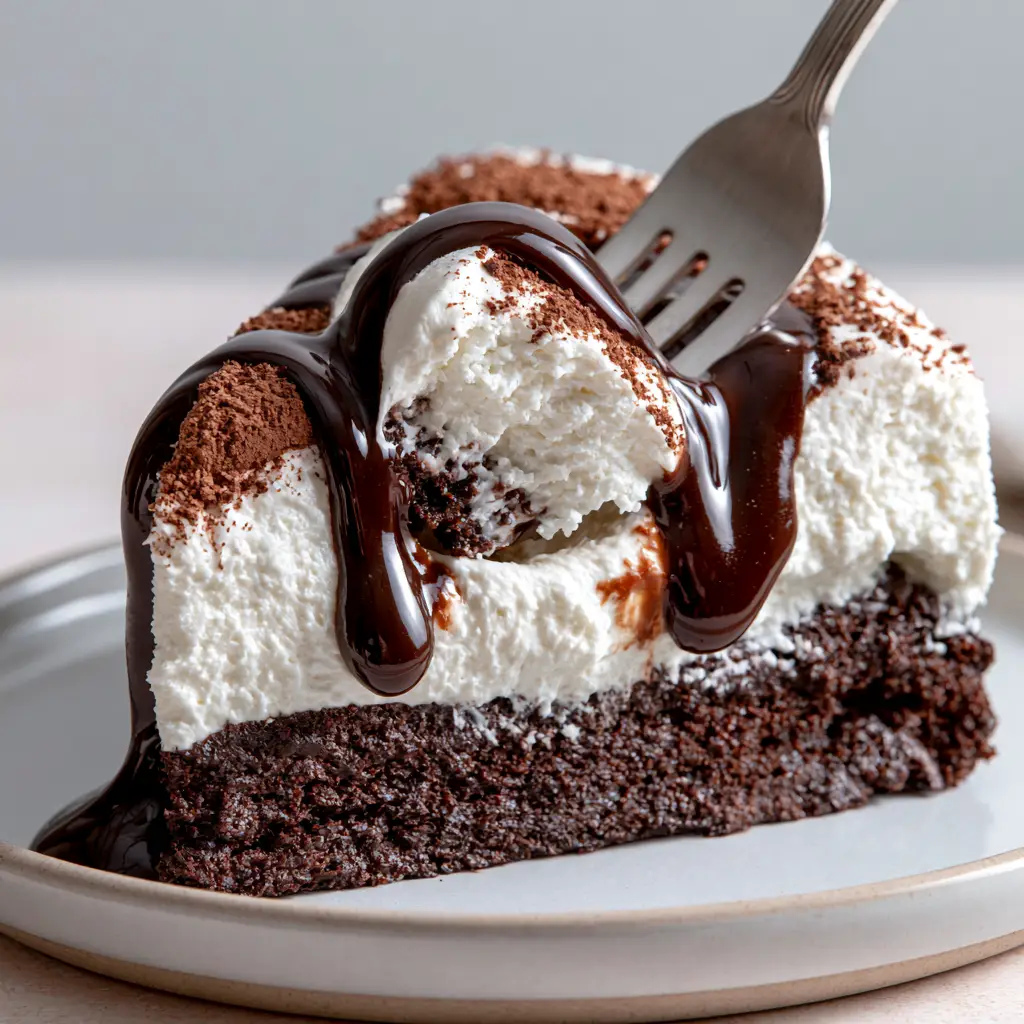
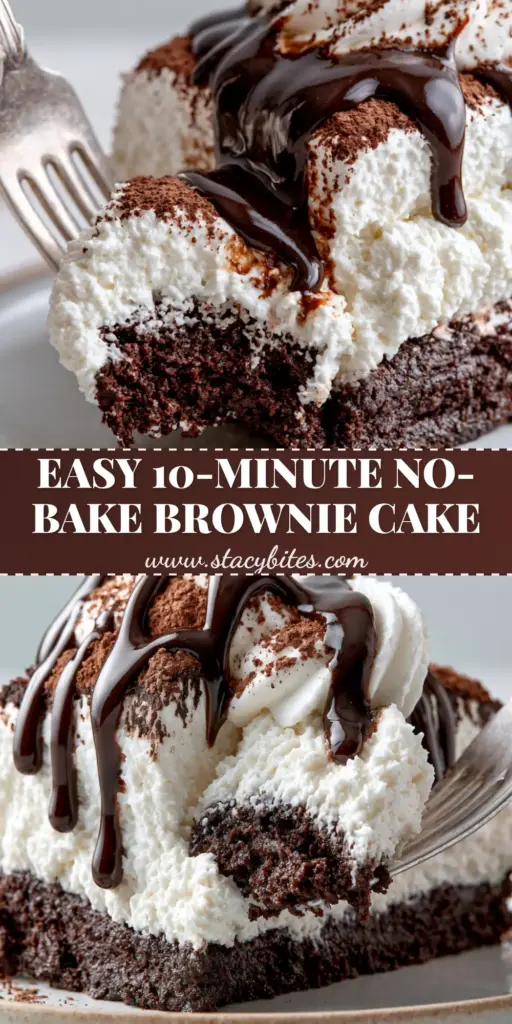
This brownie refrigerator cake is the ultimate indulgence for anyone who craves a dense dark chocolate brownie base paired with a light, airy finish. If you are looking for a show-stopping dessert that requires zero oven time, this brownie refrigerator cake delivers a decadent cross-section of fluffy white whipped cream and glossy chocolate fudge sauce that will have your Pinterest followers swooning. Whether you are a fan of quick microwave mug snacks or you prefer a chilled treat, this recipe is designed to impress with its professional-tier layers and rich, cocoa-infused flavor profile.
Why You Will Love This Indulgent Layered Treat
- Unmatched Texture: A dense, chewy dark chocolate bottom layer provides the perfect structural foundation for the lighter toppings.
- Visual Showstopper: The contrast between the stark white whipped cream and the dark cocoa powder dusting creates a high-end bakery aesthetic.
- No-Bake Ease: Skip the heat and let your fridge do the heavy lifting to set these professional layers.
- Glossy Finish: A thick, melting chocolate fudge sauce drizzle adds a luxurious, “extreme macro” detail to every single slice.
The Secret Ingredients for a Perfect Brownie Refrigerator Cake
To achieve the specific “Visual Recipe Blueprint” of a dense base and stable cream, the quality of your ingredients is paramount. We aren’t just making a cake; we are building a multi-textured experience.
The Chewy Brownie Base Essentials
Unsalted Butter: 1 cup (225g). This provides the necessary fat for a rich, fudgy mouthfeel that hardens just enough in the fridge to remain chewy but stable.
Dark Chocolate Chips: 1.5 cups (255g). Using a high percentage of cacao ensures the brownie refrigerator cake isn’t overly sweet and maintains a deep, dark chocolate color.
Dutch-Processed Cocoa Powder: 1/2 cup (45g). This gives the base its signature “dense dark chocolate” appearance and an earthy, robust flavor.
Graham Cracker or Digestive Biscuit Crumbs: 2 cups (240g). These act as the structural binder, absorbing the chocolate and butter to create a dense, brownie-like consistency without baking.
The Cloud-Like Topping & Glossy Drizzle
Heavy Whipping Cream: 2 cups (480ml). Must be kept ice-cold to achieve the velvety fluffy white whipped cream texture required for the middle layer.
Powdered Sugar: 1/2 cup (60g). This stabilizes the cream, ensuring it holds its height even after slicing.
Semi-Sweet Chocolate: 1/2 cup (85g) for the fudge sauce. Combined with a splash of cream, this creates that glossy chocolate fudge sauce that drips perfectly down the sides.
Step-By-Step: Engineering the Perfect Chilled Slice
Step 1: Constructing the Dense Brownie Foundation
Start by melting your butter and dark chocolate together in a heat-proof bowl. Once smooth, whisk in the cocoa powder and a pinch of salt. Fold in your finely crushed biscuit crumbs until the mixture is thick and heavy.
Visual Cue: The mixture should look like thick, dark mud and feel resistant when you stir it. This ensures the chewy dark chocolate brownie base is structurally sound.
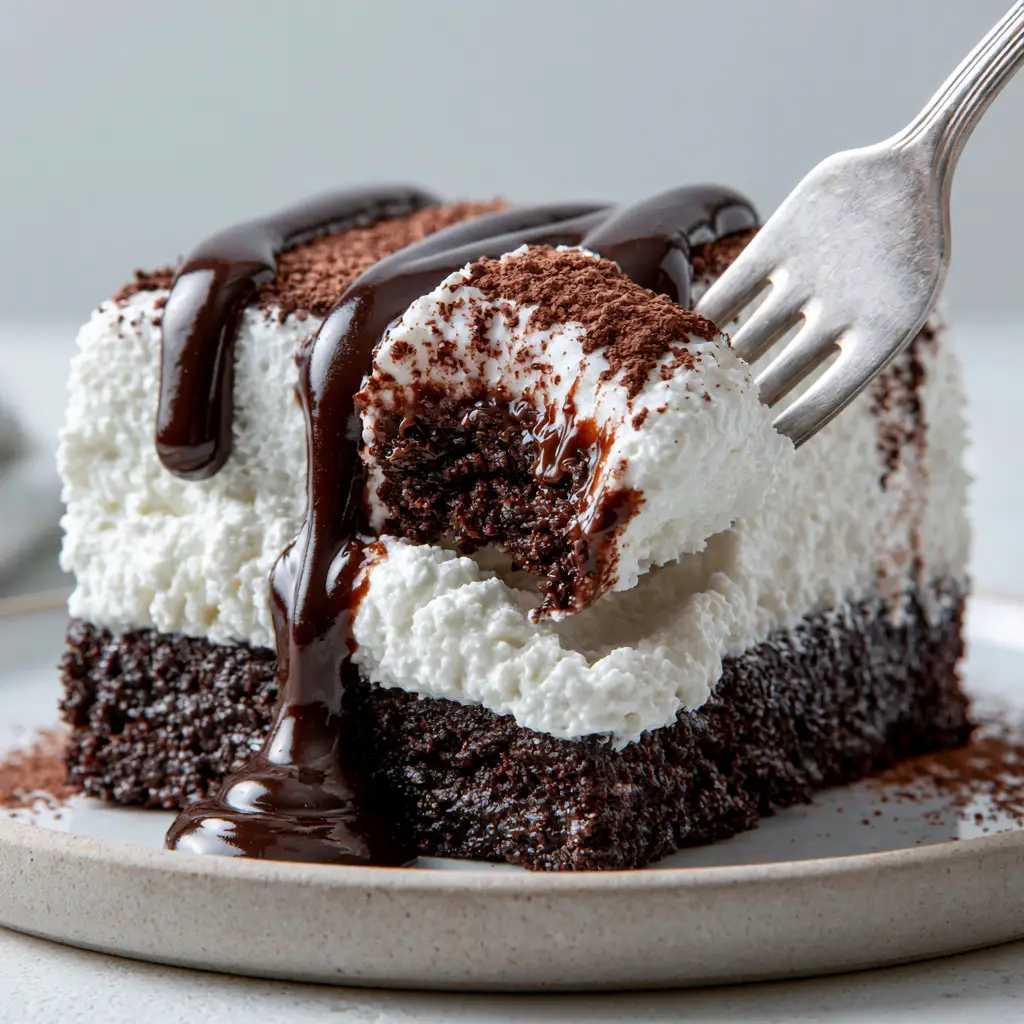
Press this firmly into an 8×8 inch (20×20 cm) lined pan. Use the bottom of a glass to pack it down tight. This density is what allows a silver dessert fork to pull a clean, layered bite later on.
Step 2: Whipping the Velvety Middle Layer
In a chilled bowl, beat the heavy cream and powdered sugar until stiff peaks form. You are looking for a thick, velvety fluffy white appearance that looks like a cloud.
Spread this over the chilled brownie base using an offset spatula. Aim for a thick layer—at least an inch (2.5cm) high—to mimic the proportions in our visual blueprint.
Step 3: The Final Flourish & Cocoa Dusting
Sift a generous amount of fine cocoa powder over the cream layer. Ensure every inch is covered in a matte, chocolatey dust. This provides a beautiful visual contrast against the white cream.
Finally, melt your fudge sauce ingredients and, using a spoon, create glossy, melting chocolate ribbons across the top. The sauce should be slightly warm but not hot enough to melt the cream.
If you love the process of building layered desserts, you might also enjoy making scotcheroos-recipe, which share that iconic chewy-bottom-glossy-top energy.
Expert Tips for Pinterest-Worthy Results
- The Chill Factor: Refrigerate the base for at least 30 minutes before adding the cream. This prevents the layers from bleeding together.
- Clean Slices: To get that perfect layered cross-section, dip your knife in hot water and wipe it clean between every single cut.
- Sifting is Key: Never just shake cocoa powder from the bag. Use a fine-mesh sieve to get that delicate matte finish.
- Heavy Cream Temp: Ensure your cream is straight from the fridge. Warm cream will result in a runny mess rather than a velvety fluffy peak.
Storage & Make-Ahead Advice
This brownie refrigerator cake actually improves with time! It can be made up to 24 hours in advance. Store it in an airtight container in the refrigerator for up to 5 days.
Freezing: You can freeze the brownie base alone for up to 3 months. However, once the fluffy white whipped cream is added, we do not recommend freezing as the texture of the cream will change upon thawing.
What to Serve with Your Brownie Cake
This dessert is incredibly rich, so it pairs beautifully with something acidic or savory to balance the palate. Consider serving it after a meal of air-fryer-bang-bang-chicken-skewers for a perfect flavor contrast.
For a refreshing drink pairing, a cold glass of milk or a sharp espresso works wonders against the glossy chocolate fudge sauce.
Frequently Asked Questions
Yes, but ensure they are very dense and fudgy. Crumble them and press them firmly into the pan to achieve the layered structural integrity required for a refrigerator cake.
Use a high-fat heavy whipping cream and stabilize it with powdered sugar. Keep the cake refrigerated until the very moment of serving.
For the best results, the base should set for 30 minutes, and the fully assembled cake should chill for at least 4 hours before slicing.
You can easily make it gluten-free by using certified gluten-free graham cracker crumbs or crushed GF chocolate cookies for the base.
Glossiness comes from the ratio of fat to sugar. Ensure you use high-quality chocolate and do not overheat the sauce, which can cause the cocoa butter to separate.
The Official Brownie Refrigerator Cake Recipe
Brownie Refrigerator Cake: The Ultimate No-Bake Layered Dessert
Ingredients
Equipment
Method
- Mix melted butter, dark chocolate, cocoa, and crumbs until a dense, chewy dough forms.
- Press the mixture firmly into the lined pan and chill for 20 minutes.
- Beat heavy cream and powdered sugar until stiff, fluffy white peaks form.
- Spread the cream over the base and dust with cocoa powder.
- Combine fudge sauce ingredients and drizzle over the cake before slicing.
Notes
Ensure the brownie base is fully chilled before adding cream.
Join the Stacy Bites Community!
Did you make this brownie refrigerator cake? I want to see your glossy fudge sauce drizzles! Save this recipe to your “Dessert Goals” board on Pinterest and follow stacy_bites for more decadent inspiration. If you enjoyed this chilled treat, please leave a 5-star rating in the recipe card above and drop a photo of your creation in the comments below!