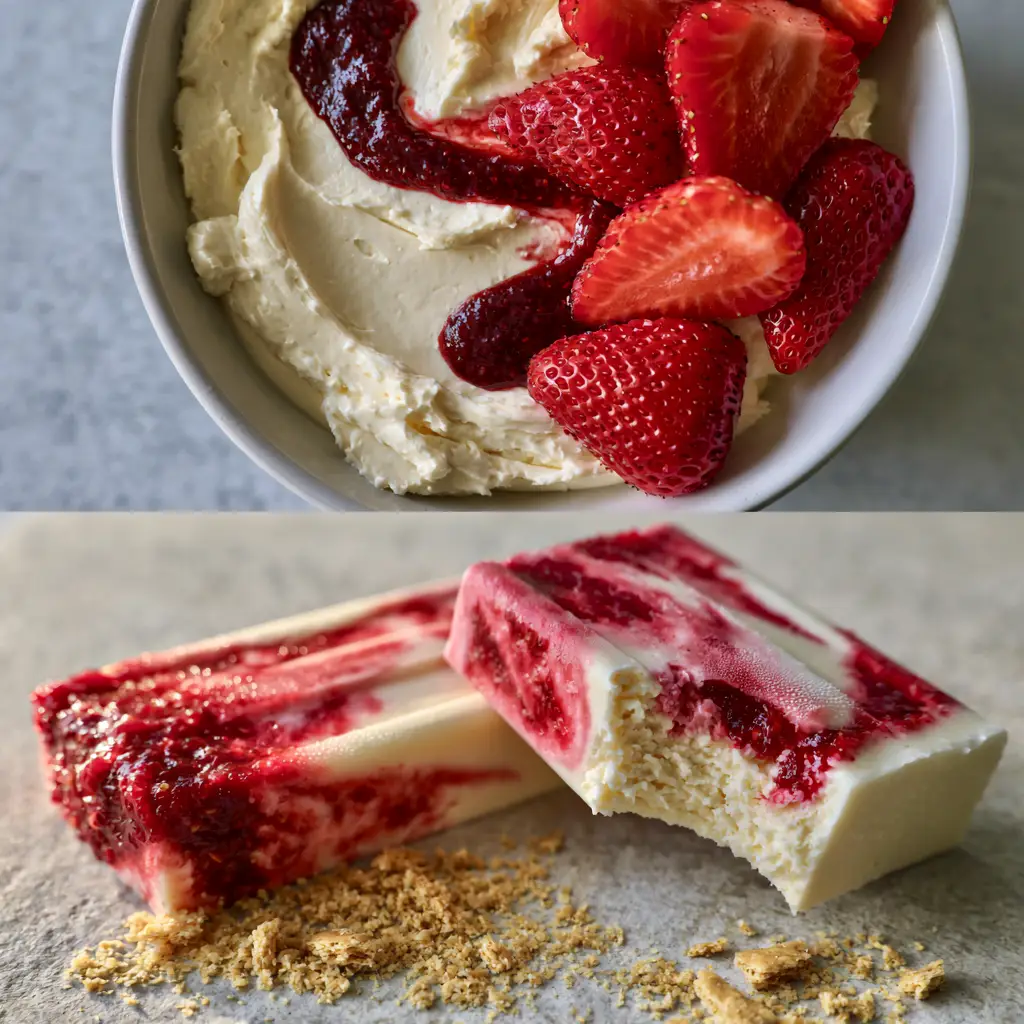
When the sun is blazing and you crave the decadent tang of a New York-style dessert, these strawberry cheesecake popsicles are the ultimate solution. Imagine a velvety cream cheese base swirled with a thick, vivid strawberry puree and finished with a buttery graham cracker crunch. This isn’t your average icy fruit pop; it is a handheld gourmet experience that looks like it stepped right out of a high-end food magazine.
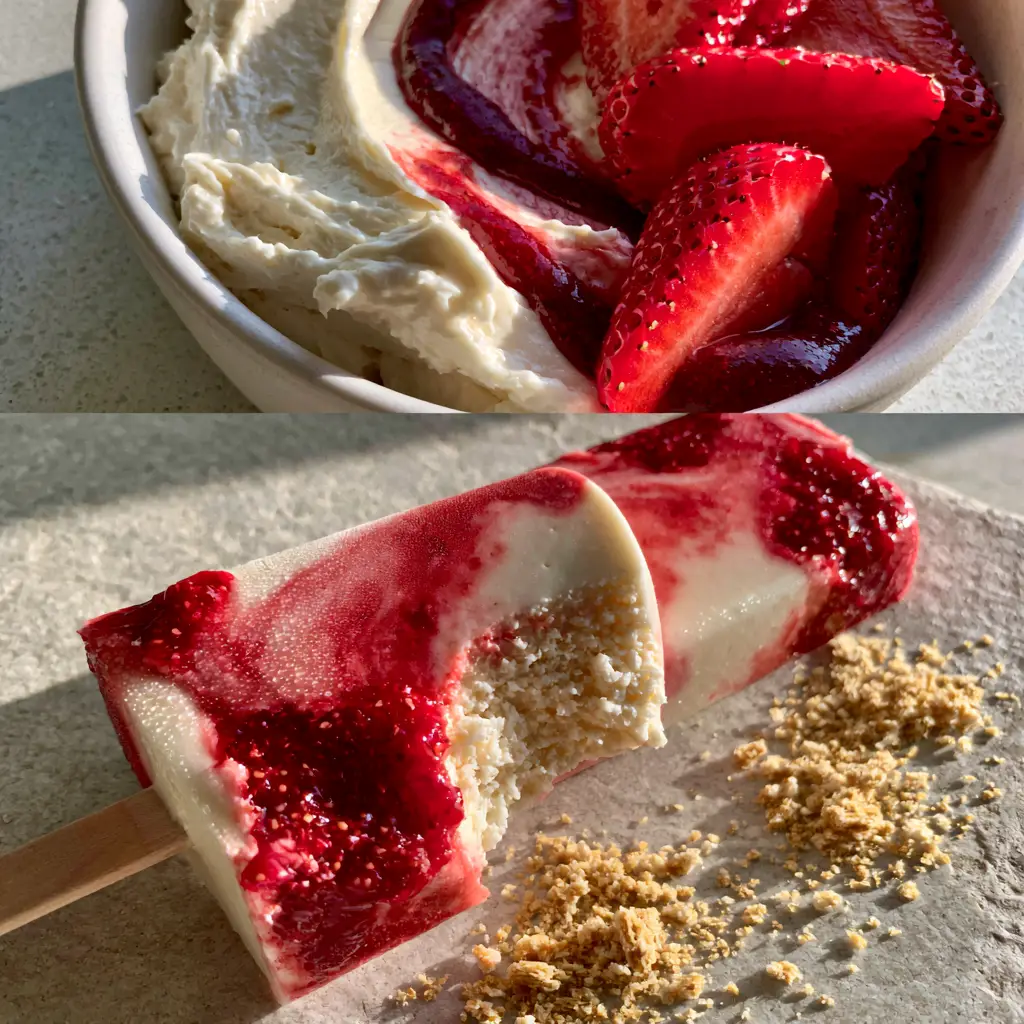
If you love refreshing summer dishes like my strawberry quinoa salad, then these strawberry cheesecake popsicles are about to become your new freezer staple. They perfectly capture the essence of a summer morning, glowing in the soft natural sunlight with delicate frozen condensation droplets clinging to their marbled surface.
Why These Are the Best Strawberry Cheesecake Popsicles You’ll Ever Make
- Ultra-Creamy Texture: The combination of full-fat cream cheese and heavy cream ensures a dense, non-icy interior that feels like frozen silk.
- Vivid Visual Marbling: We use a specific swirling technique to create heavy marbleized patterns of white cheesecake and dark red strawberry coulis.
- Authentic Vanilla Bean: Real vanilla bean specks are scattered throughout the base, providing a gourmet aesthetic and deep aromatic flavor.
- The Perfect Crunch: A thick layer of crushed golden graham cracker crumbs provides that essential cheesecake “crust” in every bite.
The Anatomy of a Gourmet Cheesecake Pop: Ingredients & Substitutions
To achieve the specific look and taste of these strawberry cheesecake popsicles, the quality of your ingredients is paramount. We aren’t just freezing juice; we are crafting a frozen custard-adjacent masterpiece.
8 oz (225g) Full-Fat Cream Cheese: This is the soul of the popsicle. It must be softened to room temperature to ensure the base is completely velvety and free of lumps.
1 cup (240ml) Heavy Whipping Cream: This adds the necessary fat to prevent large ice crystals from forming. You can substitute with full-fat Greek yogurt for a slightly tangier, high-protein version.
1/2 cup (100g) Granulated Sugar: Sugar doesn’t just sweeten; it lowers the freezing point, ensuring the popsicles remain soft enough to bite into easily.
1 tsp Vanilla Bean Paste: Unlike extract, paste provides those beautiful black vanilla bean specks that signal high-quality craftsmanship.
1.5 cups (225g) Fresh Strawberries: We use these two ways: sliced for visual texture and pureed for the deep red swirls.
1/2 cup (60g) Golden Graham Cracker Crumbs: These provide the sandy, buttery texture that balances the smooth cream cheese.
2 tbsp (30ml) Salted Butter, Melted: This binds the graham cracker crumbs together so they stay put on the base of the popsicle.
How to Master the Perfect Marbled Strawberry Cheesecake Popsicles
Follow these steps to ensure your popsicles look exactly like the decadent, smartphone-photo-ready treats in our visuals. The key is in the layering and the temperature of your ingredients.
Step 1: Create the Velvety Cheesecake Base
In a large mixing bowl, beat the softened cream cheese and granulated sugar until the mixture is completely smooth. There should be no visible lumps. Slowly pour in the heavy cream and vanilla bean paste. Whisk until the mixture is thick and glossy, resembling a pourable cheesecake batter. You should see those beautiful vanilla bean specks throughout the white base.
Step 2: Prepare the Vivid Strawberry Puree
Take half of your strawberries and blend them until you have a thick strawberry puree. For an even deeper “dark red strawberry coulis” look, simmer the puree in a small saucepan for 5 minutes with a teaspoon of sugar until it reduces and thickens. Let it cool completely. Slice the remaining strawberries into thin, bright red rounds.
Step 3: The Marbling & Layering Technique
This is where the magic happens. Do not simply mix the puree into the base. Instead, drop a spoonful of the cheesecake base into your popsicle molds, followed by a few fresh sliced strawberries. Drizzle in a teaspoon of the thick strawberry puree. Use a thin skewer or a butter knife to gently swirl the red and white mixtures together once. Repeat until the mold is nearly full, leaving a small gap at the top for the crust.
Step 4: Adding the Graham Cracker Crust
Mix your golden graham cracker crumbs with the melted butter. Gently press about a tablespoon of this mixture onto the top of each filled mold. This will become the “bottom” crust once the popsicles are unmolded. Insert your wooden sticks through the crumbs into the center of the strawberry cheesecake popsicles.
Expert Tips for Success and Non-Icy Results
1. Don’t Skip the Fat: Using low-fat cream cheese or milk will result in an icy, hard popsicle. The fat in the heavy cream and full-fat cream cheese is what creates that ultra-creamy, non-icy interior texture.
2. Tap the Molds: After filling, firmly tap the popsicle molds on your counter. This removes air bubbles and ensures the mixture fills all the crevices around the sliced strawberries.
3. The “Bite” Factor: To get that perfect “clean bite” look shown in our photos, let the popsicles sit at room temperature for 2-3 minutes before eating. This allows the outer condensation droplets to form and softens the interior just enough.
4. Freshness Matters: Use the brightest red strawberries you can find. The contrast between the vivid red fruit and the stark white cheesecake base is what makes these popsicles viral-worthy.
Storage and Freezing Guidelines
Freeze your strawberry cheesecake popsicles for at least 6 hours, though overnight is best. Once they are fully frozen, you can remove them from the molds and store them in an airtight freezer bag with parchment paper between layers. This prevents them from sticking and preserves the marbleized pattern.
These popsicles will stay fresh and flavorful for up to 3 weeks. Beyond that, the graham cracker crumbs may begin to lose their crunch, and the cream cheese might pick up “freezer flavors.”
What to Serve With Summer Treats
These popsicles are a fantastic standalone dessert, but they also pair beautifully with other summer party favorites. If you are hosting a backyard BBQ, serve these alongside air fryer bang bang chicken skewers or a light broccoli salad.
If you’re looking for more quick and easy dessert options for the kids, check out our microwave mug snacks or these classic scotcheroos.
Frequently Asked Questions
You can substitute the cream cheese and cream with plant-based alternatives (like cashew cream or coconut cream), but the texture may be slightly more icy due to the different fat structures.
Yes, you can use frozen strawberries for the coulis/puree. However, I recommend using fresh strawberries for the sliced pieces inside the popsicle for better visual appeal and texture.
Run the bottom of the popsicle mold under lukewarm water for 10-15 seconds. This will slightly melt the outer edge, allowing the marbled popsicle to slide out perfectly.
Ice crystals usually form if the fat content is too low or there is too much water. Ensure you use full-fat cream cheese and heavy whipping cream to achieve a smooth, velvety texture.
The Full Strawberry Cheesecake Popsicle Recipe
Strawberry Cheesecake Popsicles: The Ultimate Creamy Summer Treat
Ingredients
Equipment
Method
- Whisk softened cream cheese and sugar until smooth. Incorporate heavy cream and vanilla bean paste until velvety.
- Puree half the strawberries into a thick coulis; thinly slice the remaining berries.
- Layer cheesecake mixture, sliced berries, and strawberry puree in molds. Swirl gently with a skewer for a marbled effect.
- Mix graham crumbs with melted butter and press onto the top of each mold. Insert sticks.
- Freeze for at least 6 hours until solid and condensation droplets form on the surface upon removal.
Notes
Tap molds on the counter to remove air bubbles before freezing.
Save This Recipe to Pinterest!
Do you love gourmet frozen treats? Make sure to save this recipe to your Dessert Board on Pinterest! We love seeing your recreations, so please snap a photo of your strawberry cheesecake popsicles and share it in the comments below. Don’t forget to follow stacy_bites for more decadent, high-RPM recipe inspiration. If you enjoyed this recipe, please leave a 5-star rating in the recipe card above!