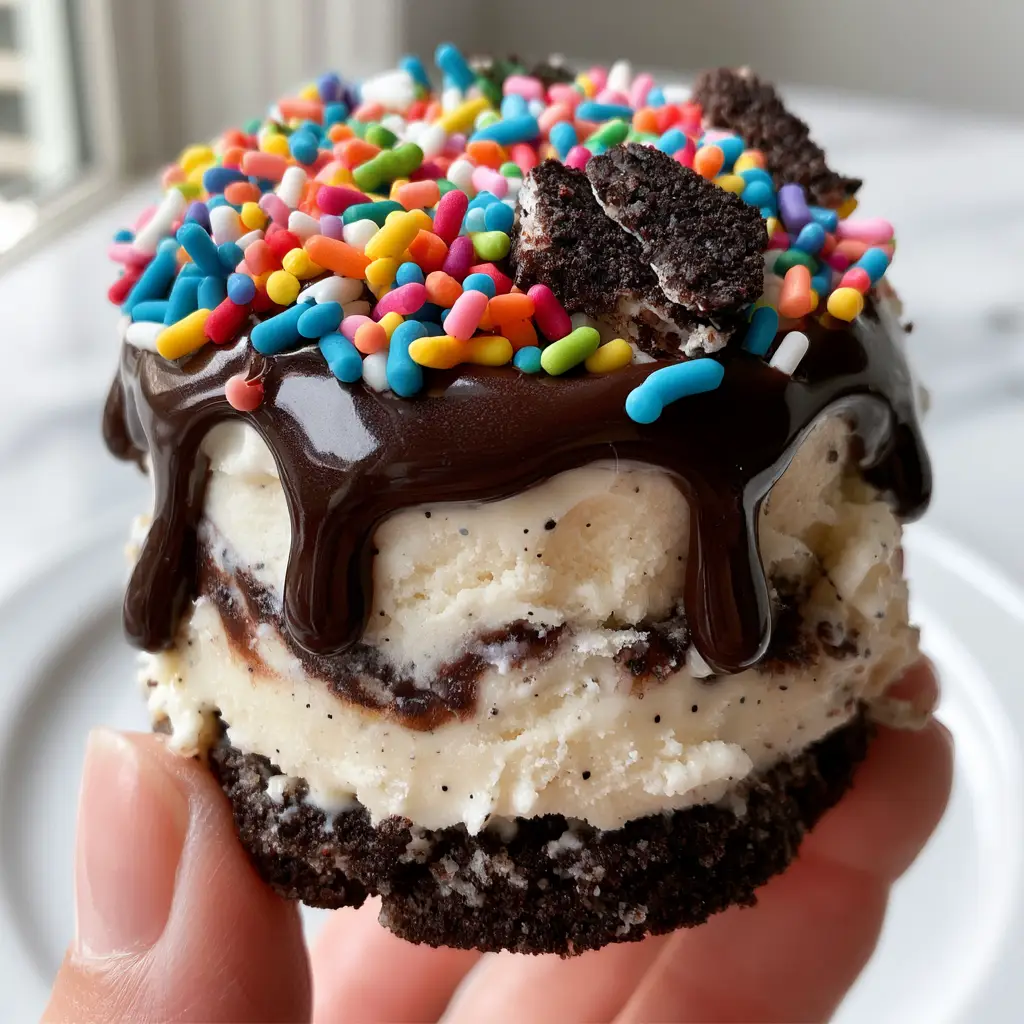
Mini Ice Cream Cakes are the ultimate handheld indulgence, combining the nostalgic crunch of a chocolate sandwich cookie crust with the sophisticated depth of vanilla bean ice cream and a glossy, decadent dark chocolate ganache. If you have been searching for the perfect no-bake dessert that looks like it came from a high-end creamery, these individual treats are your answer. Whether you are hosting a summer backyard bash or just need a stash of Mini Ice Cream Cakes in your freezer for late-night cravings, this recipe delivers a professional-grade result with minimal effort.
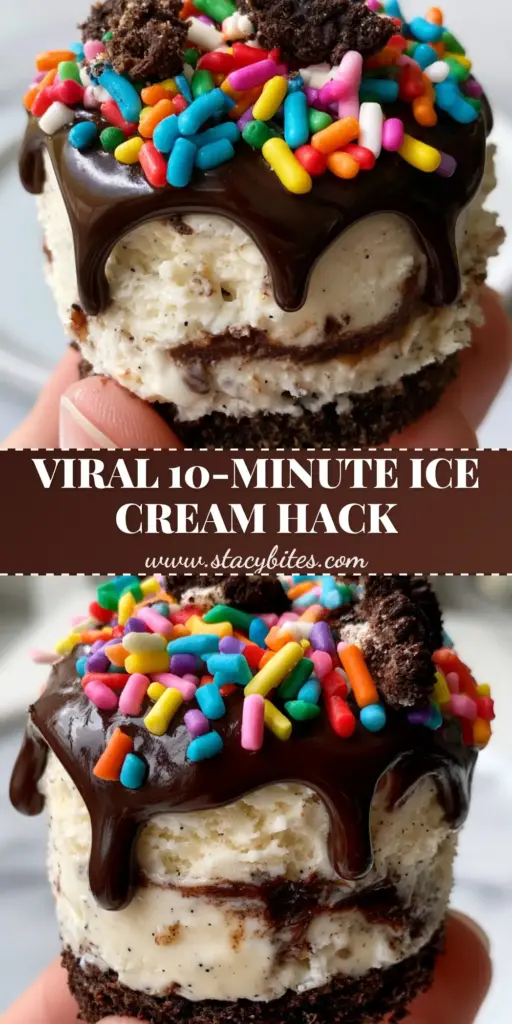
The beauty of these Mini Ice Cream Cakes lies in the interplay of textures—from the buttery, compressed cookie foundation to the silky fudge ripple and the matte pop of rainbow jimmies. They are specifically designed to be highly “pinnable” and “scroll-stopping,” capturing that authentic, unedited smartphone aesthetic that Pinterest users love. This isn’t just a recipe; it’s a blueprint for a viral dessert success that will have everyone asking for your secret.
Why These Handheld Mini Ice Cream Cakes Are a Total Game Changer
- Perfectly Portable: Served in a white paper muffin liner, these treats are made for grabbing with your fingers, no forks required.
- Triple Chocolate Threat: We are talking a crushed chocolate sandwich cookie crust, a hidden fudge swirl, and a melted dark chocolate ganache topper.
- Visual Masterpiece: The contrast of the vibrant, matte rainbow cylinder sprinkles against the dark chocolate creates an irresistible aesthetic.
- Infinite Customizability: While we use vanilla bean, you can easily swap this into a strawberry shortcake inspired version for a fruity twist.
The Essential Components for Luxury Mini Ice Cream Cakes
To achieve that elite, bakery-style finish, you need specific ingredients that prioritize both flavor and structural integrity. Here is what you need to gather for your Mini Ice Cream Cakes:
The Foundation: Chocolate Sandwich Cookies. Use 24 (approx. 270g) chocolate sandwich cookies. These provide the iconic dark hue and the perfect amount of cocoa-heavy crunch. You will need extra for the crushed cookie crumbles on top.
The Binder: Unsalted Butter. 1/4 cup (57g) of melted butter is the “glue” that creates a thick, compressed foundation. It ensures your crust doesn’t crumble the moment you peel away the liner.
The Heart: Vanilla Bean Ice Cream. 1.5 quarts (1.4L) of high-quality softened vanilla bean ice cream. Look for one with visible flecks of vanilla to provide that premium, “real food” look in your cross-section.
The Ripple: Hot Fudge Sauce. 1/2 cup (120ml) of thick, chilled fudge sauce. This is what creates that thick ripple of fudge in the center, adding a gooey surprise to every bite.
The Crown: Dark Chocolate Ganache. 4oz (113g) of 70% dark chocolate and 1/3 cup (80ml) of heavy cream. This creates a heavy, glossy pour that stays soft even when frozen, preventing that “shattering” effect when you take a bite.
The Finishing Touches: Sprinkles & Crumbles. You will need 2 tablespoons of vibrant, matte rainbow cylinder sprinkles and additional large flakes of crushed chocolate cookies for that professional garnish.
Step-By-Step: Crafting Your Mini Ice Cream Cakes
1. Preparing the Thick Cookie Foundation
Start by placing your chocolate sandwich cookies in a food processor. Pulse until you have fine crumbs. In a medium bowl, combine the crumbs with the melted butter. Line a muffin tin with white paper muffin liners. Distribute the mixture evenly, pressing down firmly with the back of a spoon or a small glass. You want a thick, compressed foundation that can support the weight of the ice cream layers above. Place the tin in the freezer for 15 minutes to set.
2. Layering the Creamy Vanilla Bean Center
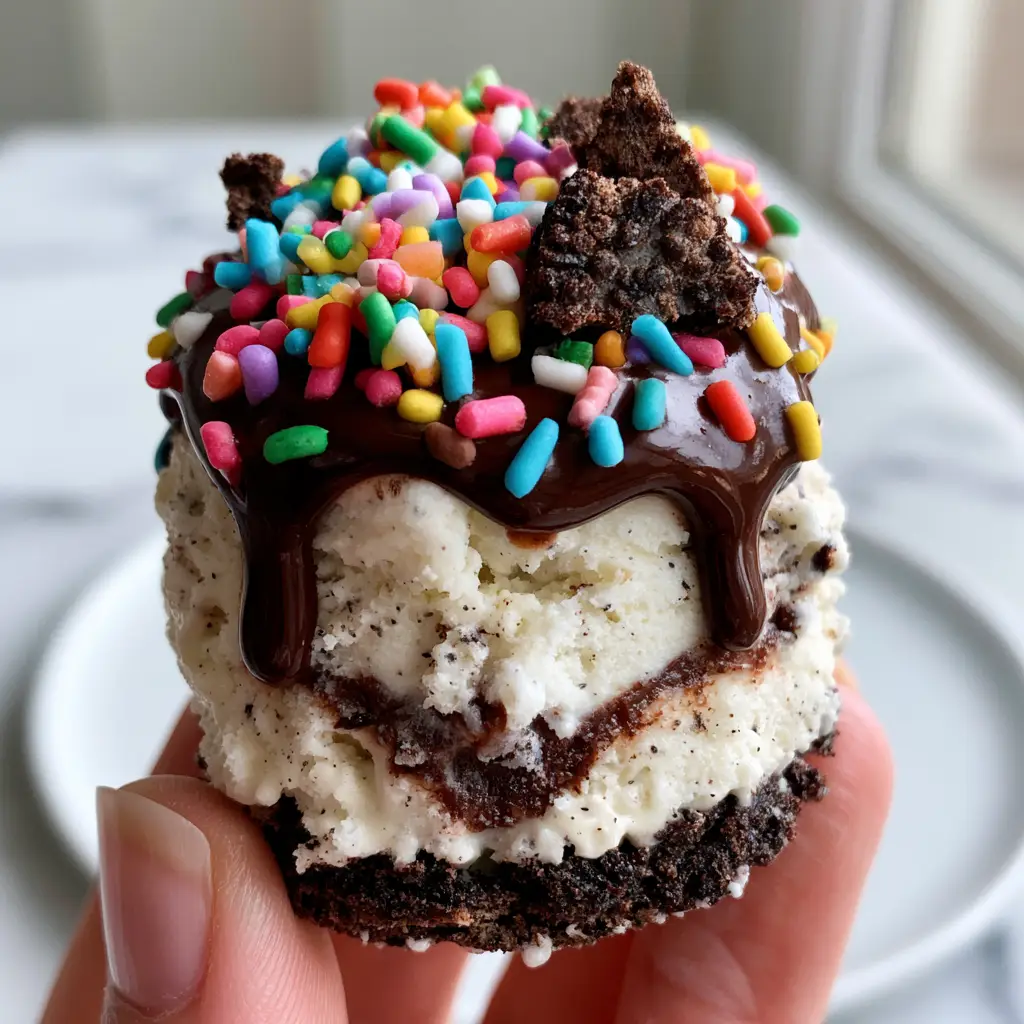
Take your softened vanilla bean ice cream and give it a quick stir. It should be the consistency of thick soft-serve. Scoop a small amount onto each cookie base, filling the liner halfway. Using a small spoon, create a little “well” in the center and drop a teaspoon of fudge sauce in. Top with more ice cream until the liner is nearly full, leaving about 1/4 inch at the top for the ganache. Use a toothpick to gently swirl the fudge into the ice cream for that visible flecks of vanilla and fudge ripple effect.
3. The Iconic Dark Chocolate Ganache Pour
While the cakes firm up in the freezer for 2 hours, prepare your ganache. Heat the heavy cream until it just begins to simmer, then pour it over the finely chopped dark chocolate. Let it sit for 3 minutes, then whisk until smooth. Allow the ganache to cool until it is just warm dark chocolate ganache—not hot. If it’s too hot, it will melt your ice cream instantly! Spoon the ganache over the top of each cake, allowing it to create a heavy, glossy pour that reaches the edges of the liner.
4. The Final Garnish & Deep Freeze
Immediately—before the ganache sets—generously top each of the Mini Ice Cream Cakes with the vibrant, matte rainbow cylinder sprinkles and large flakes of crushed chocolate cookies. This is what gives the cakes their “viral” look. Return the tin to the freezer for at least 4 hours, or ideally overnight, to ensure they are completely solid and easy to handle.
Expert Tips for Perfect Pinterest Results
- The “Handheld” Secret: To get that perfect handheld smartphone photo look, ensure the cakes are frozen rock-solid before peeling the liner. This keeps the layers distinct and prevents melting while you snap your photo.
- Avoid the Melt: Work in batches! Take only 2-3 cakes out of the freezer at a time when adding the ganache or decorating.
- Quality Matters: Since there are so few ingredients, the quality of the chocolate sandwich cookies and the vanilla bean ice cream makes a huge difference.
- The Perfect Swirl: For a more professional fudge ripple, pipe the fudge sauce into the ice cream using a small plastic bag with the corner snipped off.
How to Store and Serve Your Mini Ice Cream Cakes
These Mini Ice Cream Cakes should be stored in an airtight container in the freezer. They will stay fresh and delicious for up to 2 weeks. If you are serving them for a party, keep them in the muffin tin until the very last second. They are best enjoyed straight from the freezer, though letting them sit for 1-2 minutes at room temperature will soften the ganache just enough to create that gentle glow on the cream seen in our photos.
For more fun party treats, check out my stoner snacks guide or if you’re looking for something savory to balance the sugar, these pulled pork taquitos are always a crowd-pleaser!
What to Serve With This
While these are a standalone star, they pair beautifully with a cold beverage. Try serving them alongside a frozen strawberry lemonade slush for a refreshing summer pairing. The tartness of the lemon cuts through the richness of the Mini Ice Cream Cakes perfectly.
Frequently Asked Questions
Yes! Swap the butter for coconut oil, use dairy-free chocolate sandwich cookies, and choose a high-quality oat or coconut-based vanilla ice cream and dairy-free chocolate for the ganache.
Absolutely! In fact, using a high-quality store-bought vanilla bean ice cream saves time and ensures a consistent texture. Just make sure to soften it slightly before swirling in the fudge.
The high fat content in the cookie crust and the ice cream usually prevents sticking. However, using high-quality white paper liners and ensuring the cakes are frozen rock-solid before peeling will guarantee a clean release.
When stored in an airtight container, these cakes stay delicious for up to 2 weeks. For best flavor and to avoid freezer burn, we recommend enjoying them within 7-10 days.
The secret is using chilled fudge sauce. If the sauce is warm, it will melt into the ice cream. By using cold sauce, it stays in a thick, distinct layer that creates that beautiful visual ripple.
The Ultimate Mini Ice Cream Cakes Recipe
Mini Ice Cream Cakes with Fudge Swirl and Dark Chocolate Ganache
Ingredients
Equipment
Method
- Pulse cookies in a food processor until fine. Mix with melted butter. Press firmly into 12 muffin liners to create a thick, compressed foundation.
- Freeze the crusts for 15 minutes until set.
- Fill liners halfway with softened vanilla bean ice cream. Add a teaspoon of fudge sauce, then top with more ice cream.
- Use a toothpick to swirl the fudge for a thick ripple effect. Freeze for 2 hours.
- Combine hot cream and dark chocolate to make a glossy ganache. Pour over frozen cakes.
- Top with rainbow jimmies and crushed cookie crumbles while ganache is still warm. Freeze for at least 4 hours before serving.
Notes
Ensure the ganache is warm, not hot, to prevent the ice cream from melting during the pour.
Join the Community!
I can’t wait to see your Mini Ice Cream Cakes! If you make this recipe, please head over to Pinterest and follow me @stacy_bites for more dessert inspiration. Don’t forget to snap a photo of your distinct layers and share it in the comments below. Your feedback helps other home cooks, so please leave a 5-star rating if you loved this handheld treat!