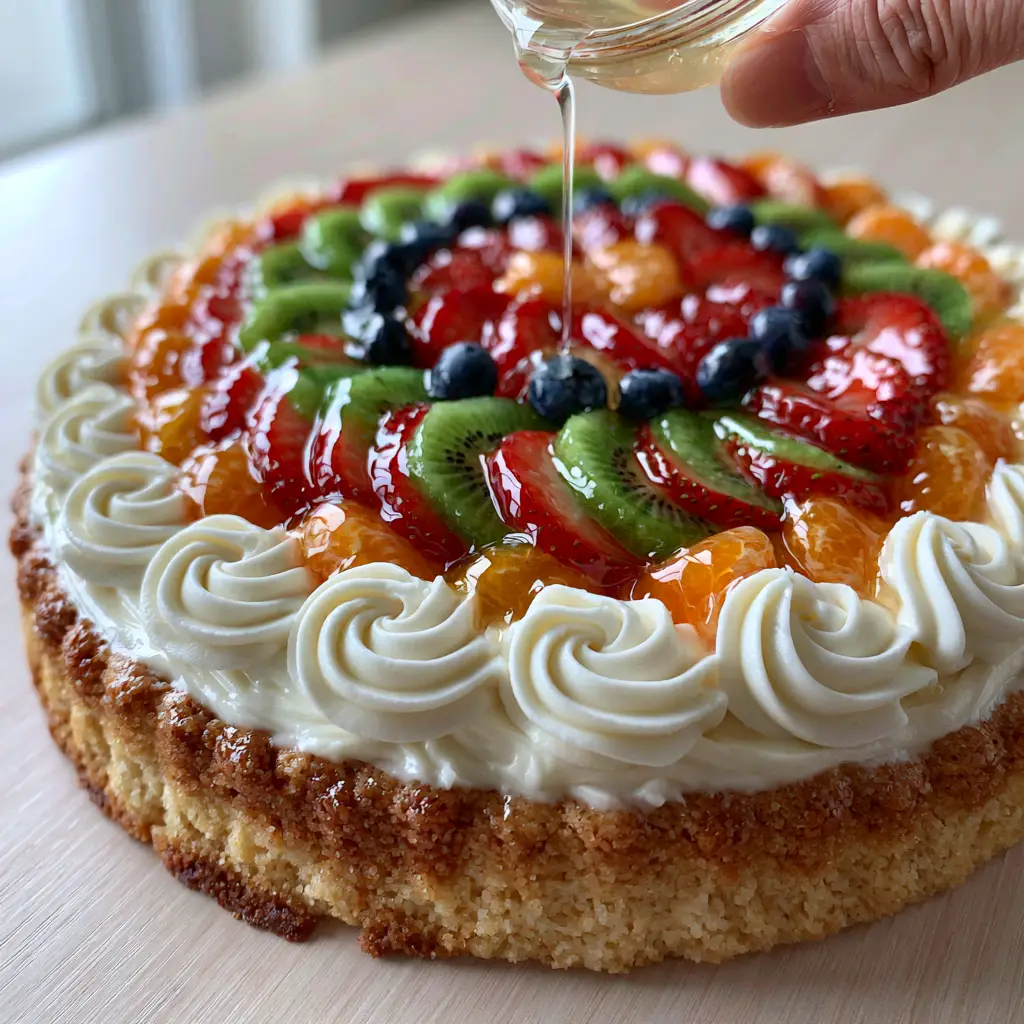
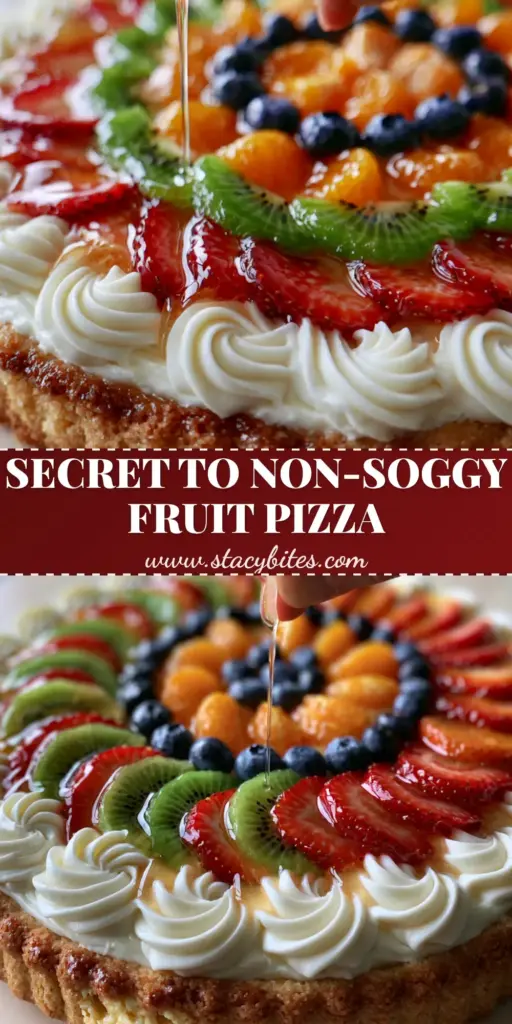
There is nothing quite like a bakery-style Fruit Pizza to capture the essence of a vibrant celebration. This isn’t your average thin-crust dessert; we are talking about a magnificent, 1-inch thick golden-brown sugar cookie base that serves as a sturdy, buttery canvas for culinary art. Imagine biting through a crisp, slightly browned outer edge into a soft, visible buttery crumb that melts in your mouth.
Topped with expertly piped cream cheese frosting rosettes and a literal explosion of color from fresh, glazed fruit, this recipe is designed to be the centerpiece of your next gathering. Whether you are looking for summer dinner ideas or a show-stopping addition to your Easter recipes, this dessert delivers on both flavor and “wow” factor. Let’s dive into the science of building the perfect dessert pizza.
Why This Bakery-Style Dessert Pizza Strategy Works
- The 1-Inch Foundation: Unlike grocery store versions, this crust is thick enough to hold the weight of dense frosting and juicy fruit without sagging.
- Textural Contrast: You get the crunch of the cookie edge, the silkiness of the cream cheese rosettes, and the snap of fresh kiwi and blueberries.
- The “Glass-Like” Finish: A clear apricot glaze provides a professional sheen that prevents the fruit from oxidizing and adds a sophisticated sweetness.
- Visual Precision: By using piped rosettes rather than a flat spread, we create “pockets” that hold the fruit in place for perfect slicing.
The Anatomy of a Perfect Fruit Pizza: Ingredients
The Thick Sugar Cookie Base
Unsalted Butter (1 cup / 225g): Softened to room temperature (about 65°F/18°C) to ensure it creams perfectly with the sugar, creating those essential air pockets for a “bakery-style” crumb.
Granulated Sugar (1 cup / 200g): This provides the sweetness and aids in achieving that signature golden-brown crisp edge we see in the visual prompt.
Large Egg (1): Acts as the primary binder, providing structure to the 1-inch thick crust so it doesn’t crumble when lifted.
Vanilla Extract (1 tsp / 5ml): High-quality pure vanilla adds the aromatic depth required to balance the tang of the cream cheese.
All-Purpose Flour (2.5 cups / 312g): Measured by weight for precision; this provides the gluten structure needed to support the heavy fruit toppings.
Baking Powder (1 tsp / 5g): This is our “invisible” foundational ingredient that gives the crust its 1-inch lift and soft, cake-like interior.
Salt (1/2 tsp / 3g): A crucial flavor enhancer that cuts through the sugar and brightens the buttery notes of the cookie.
The Silky Cream Cheese Frosting
Full-Fat Cream Cheese (8 oz / 225g): Ensure it is brick-style and completely softened to avoid lumps when piping your decorative rosettes.
Unsalted Butter (1/4 cup / 57g): Combined with the cream cheese, this adds stability and a rich mouthfeel to the swirls.
Powdered Sugar (2 cups / 240g): Sifted to ensure a “dense, silky” texture that holds its shape under the weight of the strawberries and kiwi.
The Fresh Fruit Toppings & Apricot Glaze
Fresh Strawberries (1 cup / 150g): Thin-sliced into ruby red segments to create the outer concentric circle of the pizza.
Kiwi Fruit (2-3): Peeled and sliced into vibrant emerald wheels, ensuring the black seeds are visible for that iconic Fruit Pizza look.
Whole Blueberries (1/2 cup / 75g): Plump, indigo berries provide a beautiful color contrast and a “pop” of juice in every bite.
Mandarin Orange Segments (1 small can / 300g): Well-drained to prevent excess moisture from weeping into the frosting.
Apricot Preserves (1/4 cup / 60ml): Melted and strained to create a “glass-like” transparent glaze that catches the light beautifully.
Essential Equipment for Professional Results
To achieve the macro-level detail seen in the visual blueprint, you will need a 12-inch (30cm) pizza pan or tart pan with a removable bottom. A stand mixer or hand mixer is essential for aerating the butter and sugar to get that thick, 1-inch rise.
For the “expertly piped” look, equip yourself with a large piping bag fitted with a star tip (like a 1M or 2D). Finally, a small silicone pastry brush or a glass bowl for drizzling will help you apply that final, glistening apricot glaze.
Step-by-Step Instructions for the Ultimate Fruit Pizza
Phase 1: Engineering the 1-Inch Thick Crust
Preheat your oven to 350°F (175°C). In your mixer, cream the softened butter and granulated sugar for a full 3-5 minutes until the mixture is pale and fluffy.
Add the egg and vanilla, beating until fully incorporated. In a separate bowl, whisk together the flour, baking powder, and salt. Gradually add the dry ingredients to the wet, mixing just until a soft dough forms.
Press the dough firmly into a greased 12-inch pizza pan. Use a flat-bottomed measuring cup to smooth the surface, ensuring the dough reaches the edges. Bake for 18-22 minutes.
Visual Cue: Look for the edges to turn a deep golden-brown while the center remains pale but set. The crust should have visibly puffed to a height of nearly 1 inch. Allow it to cool completely before frosting.
Phase 2: Sculpting the Cream Cheese Rosettes
Beat the softened cream cheese and butter together until smooth. Gradually add the powdered sugar, one cup at a time, until the frosting is stiff and glossy.
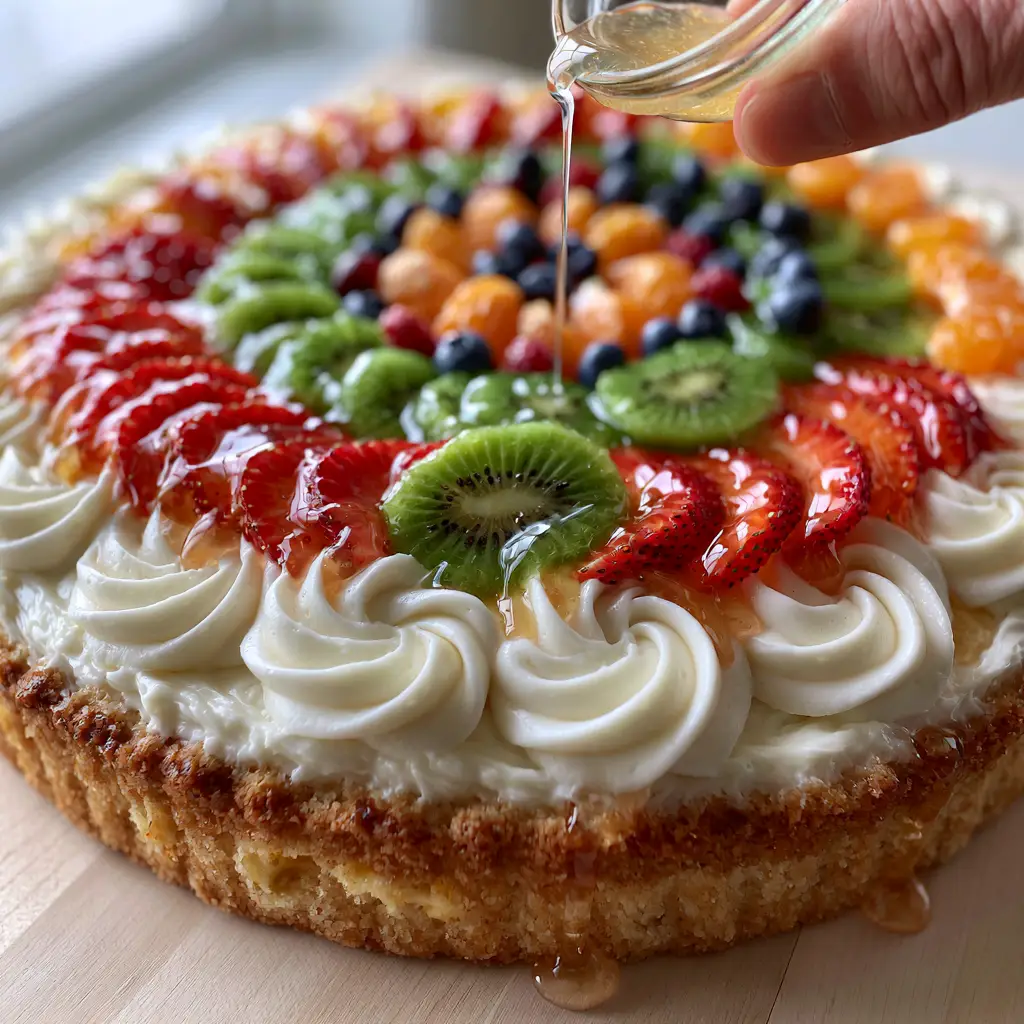
Transfer the frosting to a piping bag. Starting from the outer edge of the cooled crust, pipe thick, decorative rosettes in a circular motion. This creates the “valleys” that will hold your fruit in place.
Ensure the frosting layer is thick and even, providing a silky barrier between the cookie and the fruit juices. If you are serving this alongside other summer side dishes, this frosting stability is key for outdoor temperatures.
Phase 3: The Art of the Fruit Explosion
Starting from the outer edge, place the ruby red strawberry slices in a tight concentric circle, overlapping them slightly for a “shingled” effect.
Next, place the emerald kiwi wheels, followed by a ring of bright orange mandarin segments. Fill the center of the pizza with a mound of indigo blueberries.
Sensory Cue: You should see a vibrant spectrum of colors that pop against the white frosting. The fruit should look fresh and taut, not bruised.
Phase 4: The Glass-Like Glaze Application
In a small microwave-safe bowl, heat the apricot preserves with 1 tablespoon (15ml) of water for 30 seconds. Strain through a fine-mesh sieve to remove any fruit chunks.
While the glaze is still warm and fluid, use a small spoon or a glass bowl to drizzle a final stream of glaze over the fruit. Ensure every piece is coated in a thin, glass-like transparent layer.
This glaze doesn’t just add shine; it acts as a sealant, keeping your Fruit Pizza looking “handheld smartphone photo” perfect for hours.
Expert Tips for a Non-Soggy Fruit Pizza
- The Moisture Barrier: Always ensure your fruit—especially the mandarins—is patted bone-dry with paper towels before placing it on the frosting.
- Room Temp is Key: Never frost a warm cookie crust. The residual heat will melt the butter in the frosting, leading to a structural collapse.
- The Glaze Shield: Don’t skip the apricot glaze. It prevents the sliced strawberries from looking “leathery” and keeps the kiwi vibrant.
- Slicing Precision: Use a long, sharp chef’s knife and wipe it clean between every slice to maintain those clean white frosting lines.
Storage, Make-Ahead, and Freezing
This Fruit Pizza is best enjoyed within 6 hours of assembly for the ultimate crisp-to-creamy ratio. However, leftovers can be stored in an airtight container in the refrigerator for up to 2 days.
To make ahead, bake the crust and prepare the frosting up to 24 hours in advance. Keep the crust at room temperature (wrapped) and the frosting in the fridge. Assemble and glaze just before serving for the freshest results.
What to Serve with Your Dessert Pizza
This fruit-forward dessert pairs beautifully with light, refreshing summer fare. If you are hosting a backyard BBQ, consider serving it after a spread featuring caprese pasta salad or a refreshing California roll cucumber salad.
For a brunch setting, it stands out alongside an Easter bunny punch. The sweetness of the cookie crust is the perfect foil for salty sides like boat dip or a savory Frito corn salad.
Frequently Asked Questions
Yes! You can bake the crust, let it cool completely, wrap it tightly in plastic wrap and foil, and freeze for up to 3 months. Thaw at room temperature before frosting and decorating.
While you can, store-bought dough is often formulated for thinner cookies. To achieve the specific 1-inch thickness and sturdy bakery-style crumb seen here, our homemade recipe with baking powder is highly recommended.
The key is to create a moisture barrier with thick cream cheese frosting and to ensure all fruit is patted completely dry with paper towels. Additionally, applying the apricot glaze seals the fruit and prevents juices from running.
It is best served within 6-12 hours. However, it will stay safe and edible in an airtight container for up to 2 days, though the crust will naturally soften over time.
Apricot preserves are the gold standard for fruit pizzas. When melted and strained, they provide a clear, glass-like finish that doesn’t significantly alter the color of the fruit while adding a subtle, professional shine.
The Ultimate Bakery-Style Fruit Pizza Recipe
Fruit Pizza with a Thick Sugar Cookie Crust and Cream Cheese Frosting
Ingredients
Equipment
Method
- Cream butter and sugar for 3-5 minutes until pale and fluffy. Add egg and vanilla and beat well.
- Whisk flour, baking powder, and salt. Gradually add to wet ingredients to form a dough.
- Press dough into a 12-inch pizza pan. Bake at 350°F (175°C) for 18-22 minutes until edges are golden brown. Cool completely.
- Beat cream cheese, butter, and powdered sugar until silky. Pipe rosettes onto the cooled crust using a star tip.
- Arrange sliced strawberries, kiwi, mandarin segments, and blueberries in concentric circles over the frosting.
- Melt apricot preserves with 1 tbsp water, strain, and drizzle over the fruit for a glass-like finish.
Notes
Ensure all fruit is dried thoroughly to prevent the frosting from becoming runny.
Bring the Bakery Home Today!
This Fruit Pizza is more than just a dessert; it’s a celebration of seasonal flavors and professional pastry techniques. With its 1-inch thick crust and glistening apricot glaze, it is guaranteed to be the most photographed dish on your table. We would love to see your creations!
Please leave a comment below and let us know which fruits you chose for your masterpiece. Don’t forget to follow us on Pinterest and share this recipe with your fellow home cooks. Happy baking!